Markdown Library
I use the next-mdx-remote library to handle markdown, the selection of this library is based on several things, namely:
next-mdx-remotealready supports react server component really well (atleast on my use case).- Accessing frontmatter can be done easily.
- It can access markdown on external sources, this is necessary when we want to put markdown outside of our website such as when we want to put markdown in a different Github repository and want to access it using REST API.
How it Works
In this section I’ll explain how I manage .mdx files in my application, access content and frontmatter, styling content, and create custom components for markdown elements.
MDX files location
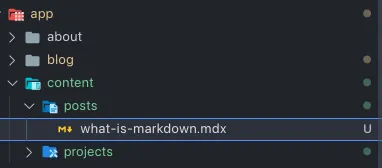 You can put
 .mdx files anywhere in your project directory, but on this website all .mdx files are placed in the /app/content folder as shown above.
Accessing frontmatter and content
To be able to access frontmatter and content from files outside MDX, we can take advantage of the compileMDX method from next-mdx-remote. Here is the code example.
// @/lib/mdx/post.jsimport fs from 'fs'import path from 'path'import { compileMDX } from 'next-mdx-remote/rsc'
//get root directory of your mdx filesconst rootDirectory = path.join(process.cwd(), 'app', 'content', 'posts')
export const getPostBySlug = async (slug) => {  const realSlug = slug.replace(/\.mdx$/, '')  const filePath = path.join(rootDirectory, `${realSlug}.mdx`)  const fileContent = fs.readFileSync(filePath, { encoding: 'utf8' })
  const { frontmatter, content } = await compileMDX({    source: fileContent,    options: {      parseFrontmatter: true    }  })
  return { meta: { ...frontmatter, slug: realSlug }, content }}
In the example above, I created a getPostBySlug function that returns metadata and content from the post. Frontmatter and content in the return value I got from the compileMDX method.
Now, your frontmatter and MDX content can be accessed from any component using those functions, both client and server components. Here is an example of accessing it on a server component in NextJS 13.
import { redirect } from 'next/navigation'import { getPostBySlug } from '@/lib/mdx/post'const Page = async ({ params }) => { let post try { post = await getPostBySlug(params.slug) } catch (err) { console.error(err) redirect('/') } return ( <div> <h1>{post.meta.title}</h1> <div>{post.content}</div> </div> )}Styling content and custom components
Using Tailwind CSS plugin
In my opinion, the fastest way to style compiled markdown elements is to use the @tailwindcss/typography plugin, with this plugin, you can set typography styling on your markdown elements by setting custom CSS variables in tailwind.config.js, then wrapping the element with the “prose” class (class from @tailwindcss/typography plugin), so the styling of the markdown content will be applied automatically based on your plugin customization.
<div className="prose">{post.content}</div>For further customization, you can refer to the plugin documentation here .
Using custom component
In some cases, TailwindCSS typography plugin may not be enough for your needs, if you are faced with it or you don’t use TailwindCSS and still want to customize your markdown elements, you can take advantage of the custom component feature provided by next-mdx-remote.
Here is an example of its implementation :
// @/lib/mdx/mdx-components.jsximport { AiOutlineLink } from "react-icons/ai";import MarkdownHeaderLink from "@/components/shared/markdown-header-link";
const components = {  // put all your custom components here  h2: (props) => (    <MarkdownHeaderLink headingId={props.id}>      <div className="flex items-center gap-2">        <AiOutlineLink className="text-2xl text-lowContrast" />        <h2 {...props} />      </div>    </MarkdownHeaderLink>    ),  };}
export default components;
const { frontmatter, content } = await compileMDX({ source: fileContent, options: { parseFrontmatter: true }, components //your custom components})Pass the custom components when you use the compileMDX method, so that each h2 element in the content will be replaced with the custom components that you have created.
Final Words
That’s how I applied markdown to Next13 using the next-mdx-remote plugin, remember that this method is not solely the most correct way but only the way I personally use. Use ways and plugins that are more effective in your opinion according to the project you create.